
Using a wallet day to day
Find your way around the device
A quick tour of the screens you will use every day.
Steps
Unlock the device with your PIN. The Main menu opens.
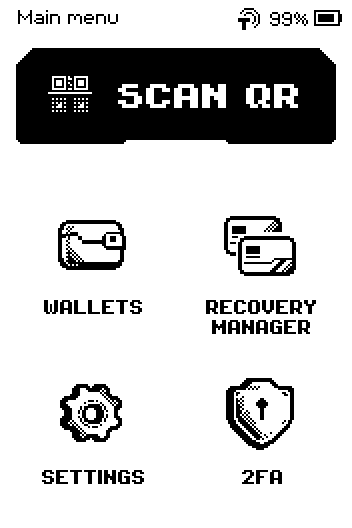
Main menu with SCAN QR, WALLETS, RECOVERY MANAGER, SETTINGS and 2FA. SCAN QR — opens the camera. Use it to sign a transaction from any wallet (ERA picks the wallet), save a multisig descriptor or add 2FA codes. See SCAN QR: one button for everything.
WALLETS — your list of wallets.
RECOVERY MANAGER — backups, seed-word checks and the ERA card.
SETTINGS — device settings (PIN, display, updates).
2FA — one-time login codes stored on the device.
Tap WALLETS. Each row is one wallet; the plus sign or ADD WALLET adds another.
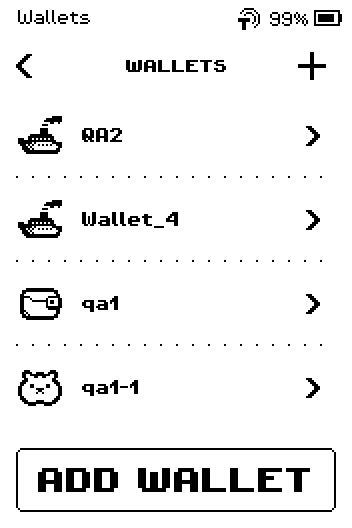
WALLETS list with four wallets, a plus sign in the header and an ADD WALLET button. Tap a wallet to open the wallet screen.
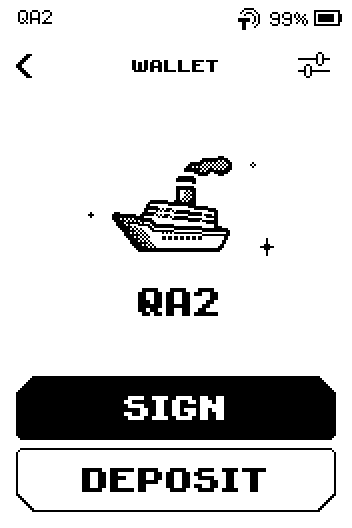
Wallet screen with the wallet icon and name, SIGN and DEPOSIT buttons and the sliders icon at the top. SIGN — scan a transaction from your app and approve it.
DEPOSIT — show an address to receive coins.
The sliders icon at the top opens the wallet's settings: passphrase, link, password, rename, icon, backup, delete.
Read the status bar at the top: it shows the wallet name, the Tap Sign icon and the battery level.
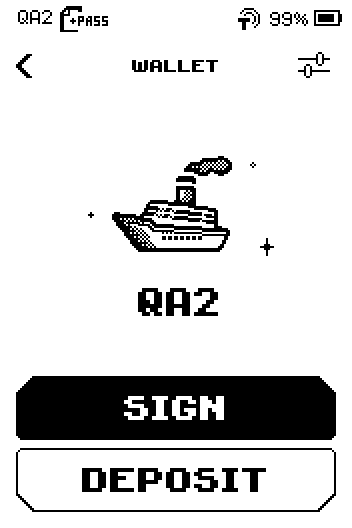
Status bar showing the wallet name QA2 with a +PASS icon, the Tap Sign icon and 99% battery. A small +PASS icon next to the name means a passphrase is applied to this wallet (see Use a passphrase).
On long lists, swipe up or down to turn the page. The scroll bar beside the list shows where you are.
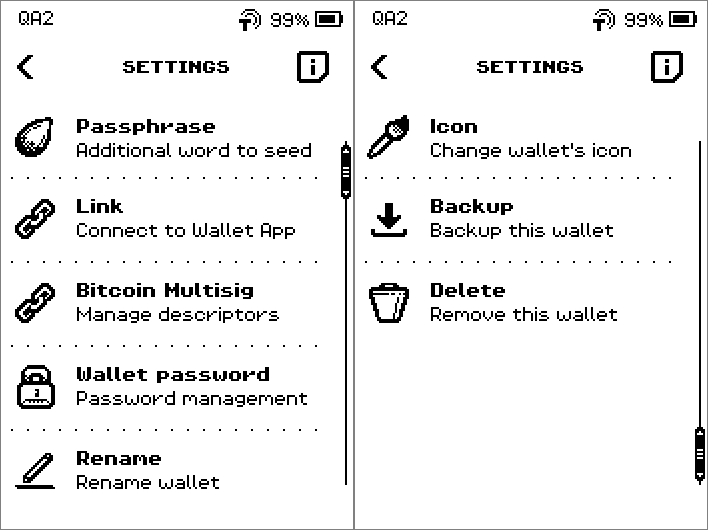
Wallet SETTINGS list, two pages, with a scroll bar beside the rows. Tap the chevron < at the top of the screen to go back one screen. An X closes the current screen.
Press the hardware button once to go back one level: to the wallet, then to the Main menu. On the Main menu, the same button locks the device.
Press and hold the hardware button to open the power menu.
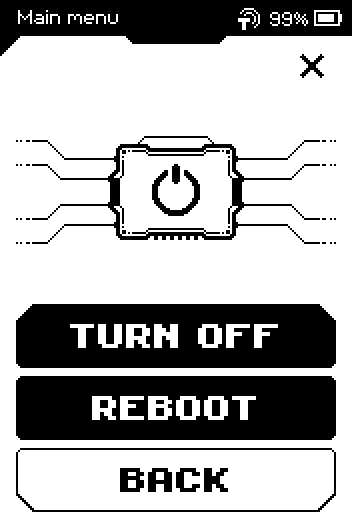
Power menu with TURN OFF, REBOOT and BACK buttons.
Note: While the ERA sits on the charging pad, the hardware button does nothing. Tap the touchscreen instead; take the device off the pad when you need the button.
Done
You can reach any wallet, its address and its settings from the Main menu in two taps.
Trouble?
A tap does nothing → the e-ink screen refreshes in about half a second; wait for the redraw before tapping again.
The screen looks frozen after a swipe → swipe a little longer; short swipes are read as taps.
You are lost in a sub-menu → press the hardware button once to return to the wallet or Main menu.