
Device settings and firmware updates
Set brightness, auto lock and vibration
The screen is e-paper, so "brightness" means the front light that lights it up in the dark.
Steps
Part 1: Front light
On the main menu, tap SETTINGS > Display.
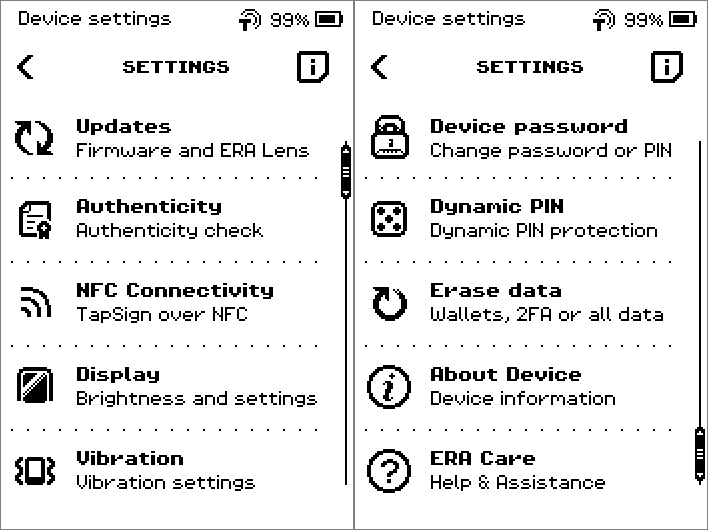
Settings list with Updates, Authenticity, NFC Connectivity, Display and Vibration, paging to the second half of the list Tap Front light.
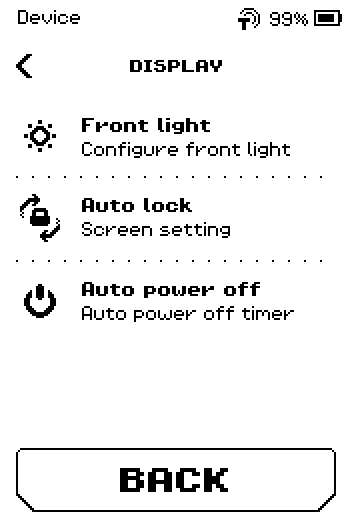
Display menu: Front light, Auto lock, Auto power off Tap the Adaptive brightness switch to turn it on or off. Changes save at once.
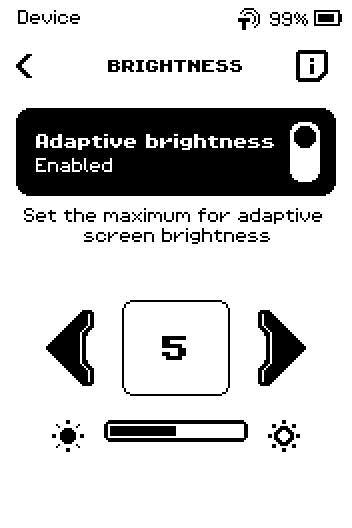
Brightness page with Adaptive brightness Enabled and level 5
Note: With Adaptive brightness Enabled, the level is the maximum the light sensor may use. With it Disabled, the level is constant.
Tap the arrows to set the level from 0 to 10.
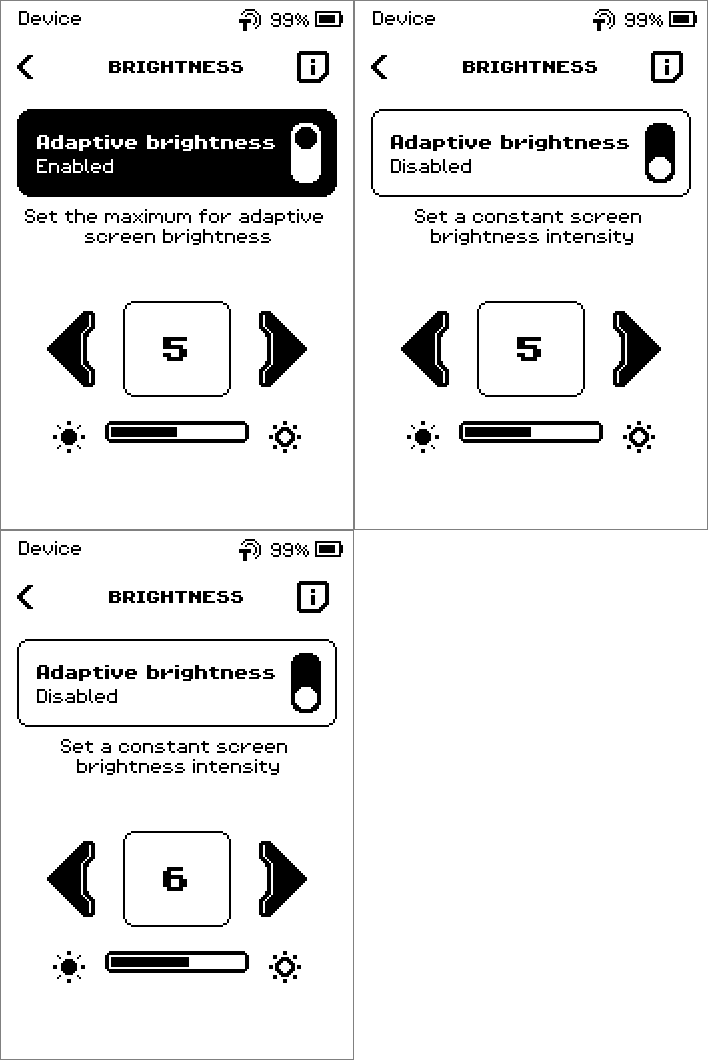
Adaptive brightness switched off, then level raised from 5 to 6 Optional: tap the i icon to read the explanation on the device.
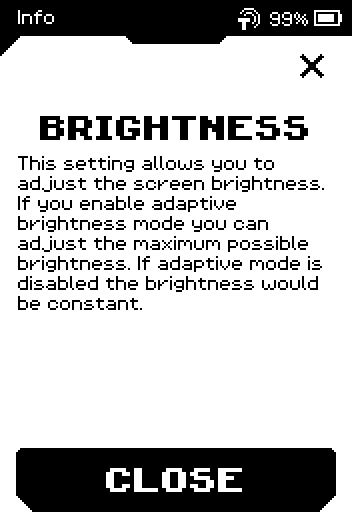
Brightness info page explaining adaptive and constant brightness
Part 2: Auto lock
Under Display, tap Auto lock.
Display menu: Front light, Auto lock, Auto power off Tap the arrows to pick a time: 30 s, 45 s, 1, 2, 5, 10, 20 or 30 min.
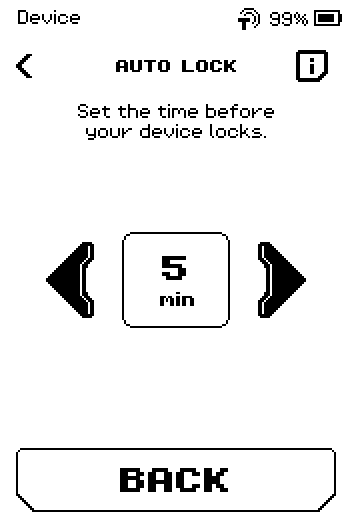
Auto lock page showing 5 min between two arrows, bottom button BACK Tap DONE. After that time without a touch, the device locks and asks for the PIN.
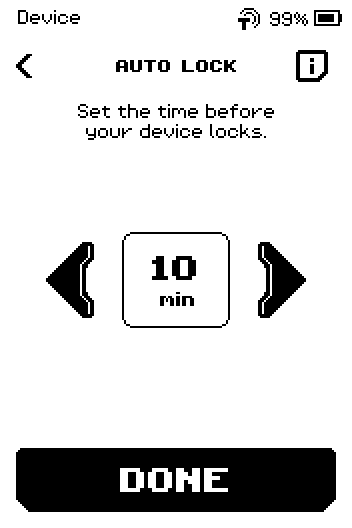
Auto lock changed to 10 min, bottom button now reads DONE
Part 3: Auto power off
Under Display, tap Auto power off.
Display menu: Front light, Auto lock, Auto power off
Note: If the power-off time is shorter than or equal to the auto-lock time, the device turns off 15 seconds after it locks.
Tap the arrows to pick a time: 15 s, 30 s, 45 s, 1, 2, 5, 10, 20 or 30 min.
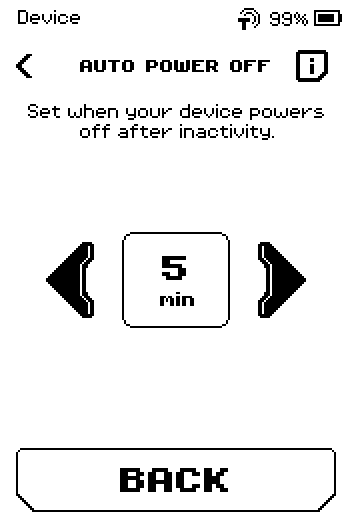
Auto power off page showing 5 min between two arrows, bottom button BACK Tap DONE.
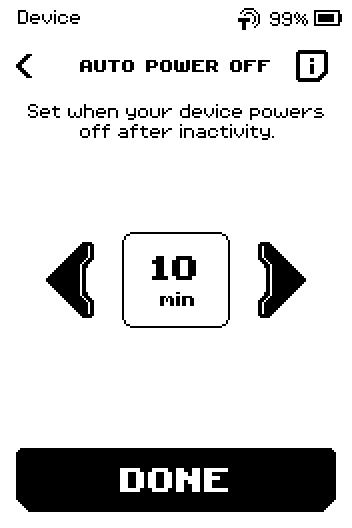
Auto power off changed to 10 min, bottom button now reads DONE Optional: tap the i icon to read how the two timers interact.
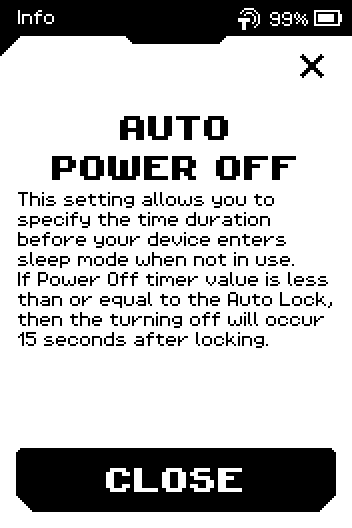
Auto power off info page describing the 15-second rule
Part 4: Vibration
On the main menu, tap SETTINGS > Vibration.
Settings list with Updates, Authenticity, NFC Connectivity, Display and Vibration, paging to the second half of the list Tap DISABLE or ENABLE.
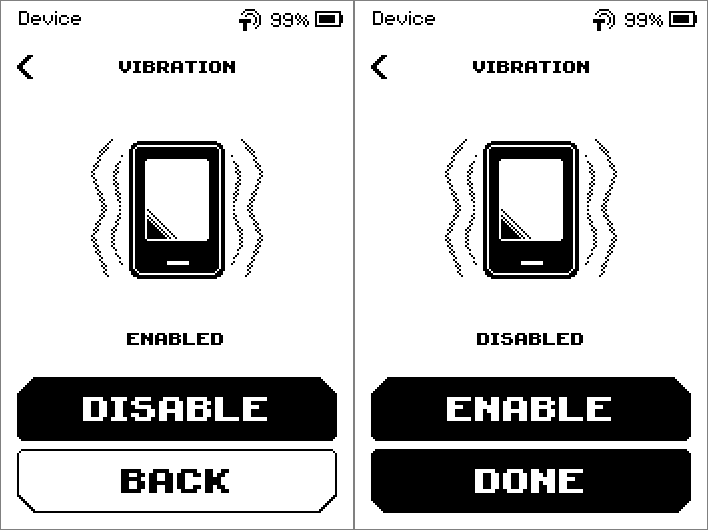
Vibration page toggling between ENABLED with DISABLE button and DISABLED with ENABLE and DONE buttons Tap DONE.
Done
Each setting page shows the value you chose. The settings are saved and stay after a restart.
Trouble?
The bottom button says BACK instead of DONE → you have not changed the value yet; tap an arrow first.
The screen looks dim in daylight → that is normal for e-paper; the front light is for dark rooms.
Brightness seems to change by itself → Adaptive brightness is Enabled; disable it for a fixed level.