
Bitcoin multisig
Export your cosigner key
Do this once for every ERA wallet that will be a cosigner. The coordinator app is where you build the multisig wallet; ERA only hands over its public key.
Steps
On the Main menu, tap WALLETS.
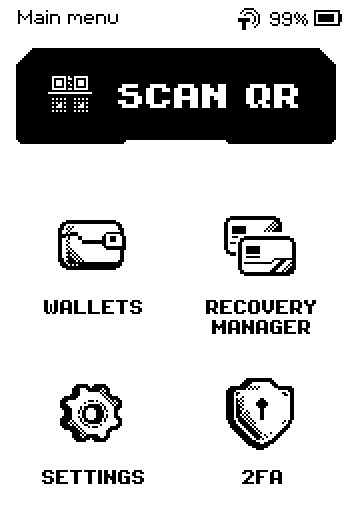
Main menu with SCAN QR, WALLETS, RECOVERY MANAGER, SETTINGS, 2FA Tap the wallet that will be the cosigner.
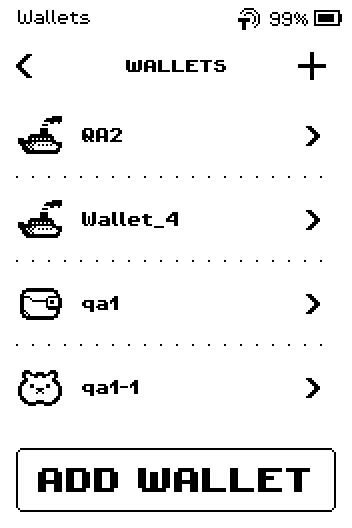
Wallets list with QA2, Wallet_4, qa1, qa1-1 On the wallet page, tap the sliders icon in the header.
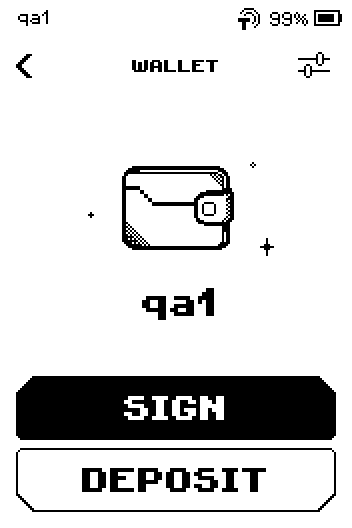
Wallet page qa1 with SIGN and DEPOSIT buttons Tap Bitcoin Multisig.
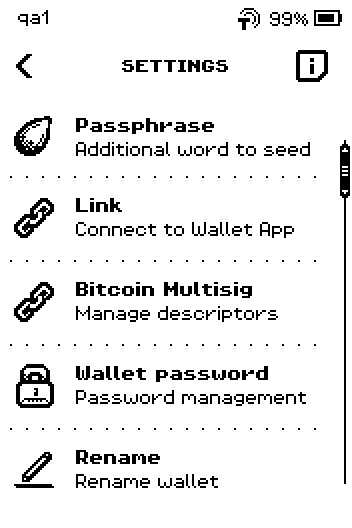
Wallet SETTINGS list with Passphrase, Link, Bitcoin Multisig, Wallet password Tap Export XPUB.
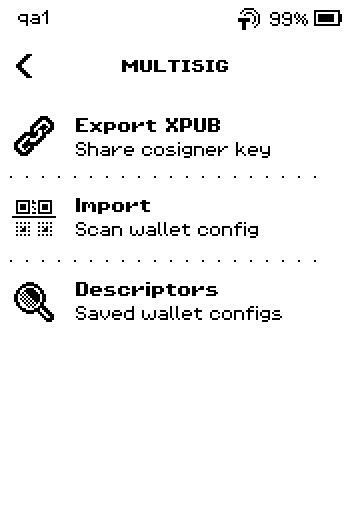
MULTISIG menu with Export XPUB, Import, Descriptors Read the text shown with the QR code. It gives the script format (Native SegWit, P2WSH), your wallet's Fingerprint and the key itself.
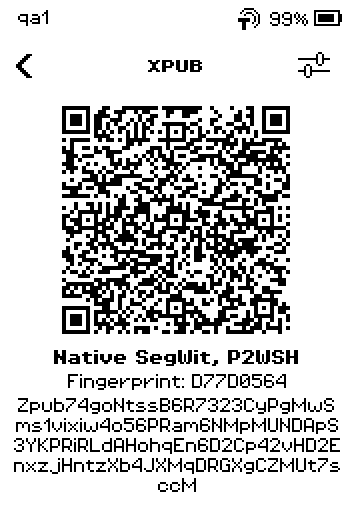
XPUB QR code, Native SegWit P2WSH, Fingerprint D77D0564, Zpub text
Note: The QR code holds no secret. It contains the fingerprint (an 8-character ID of your wallet), the key path
m/48'/0'/0'/2', the public key (starts withZpub) and the nameERA_<wallet name>. Nobody can spend bitcoin with it.
In the coordinator app, choose to add a cosigner by scanning a QR code.
Image coming soon — coordinator app (Sparrow) on the "Add cosigner / Airgapped hardware wallet" screen, phone camera pointed at the ERA XPUB QR codeShow the ERA screen to the phone camera. The coordinator adds ERA as a cosigner.
Compare the Fingerprint on ERA with the fingerprint the coordinator shows for the new cosigner. They must match.
Image coming soon — coordinator cosigner card showing fingerprint D77D0564, xpub and path m/48'/0'/0'/2'Tap the back chevron to leave the QR page.
If the coordinator asks for Nested SegWit (P2WSH-P2SH)
On the XPUB page, tap the sliders icon in the header.
Tap Nested SegWit.
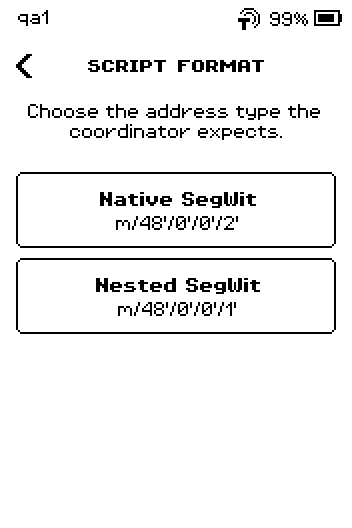
SCRIPT FORMAT page with Native SegWit m/48'/0'/0'/2' and Nested SegWit m/48'/0'/0'/1' Show the new QR code to the coordinator instead. Its text now reads Nested SegWit, P2WSH-P2SH and the key starts with
Ypub.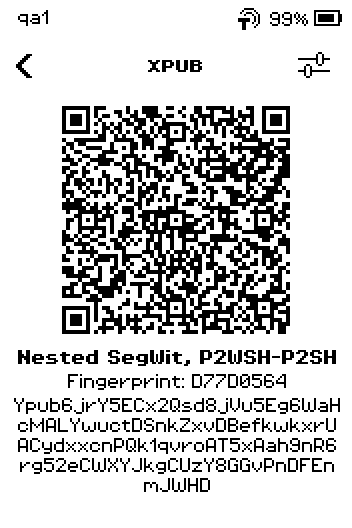
XPUB QR code, Nested SegWit P2WSH-P2SH, Fingerprint D77D0564, Ypub text
Done
The coordinator lists ERA as a cosigner with the same fingerprint as the ERA screen. Repeat these steps on the other ERA cosigners, if any, then build the wallet in the coordinator.
Trouble?
The coordinator rejects the QR code or reports a wrong key type → your wallet uses a different script format. Tap the sliders icon on the XPUB page and tap the format the coordinator shows.
Fingerprints differ → you scanned another ERA wallet, or a passphrase is active on this wallet. Check the wallet name in the status bar and the passphrase setting, then export again.
The phone cannot read the QR code → set the phone brightness to maximum and hold it 15–20 cm from the ERA screen.